How to: Install an Addco Rear Anti-Sway Bar
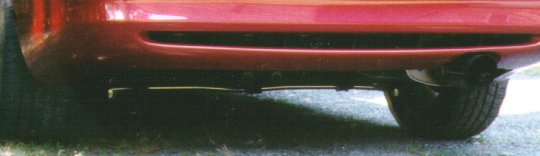
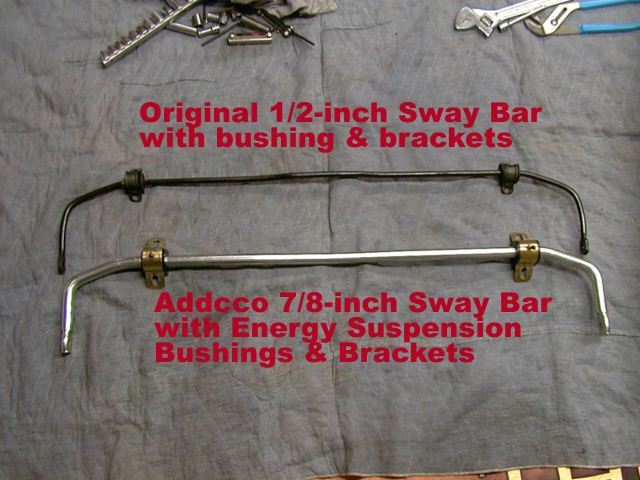
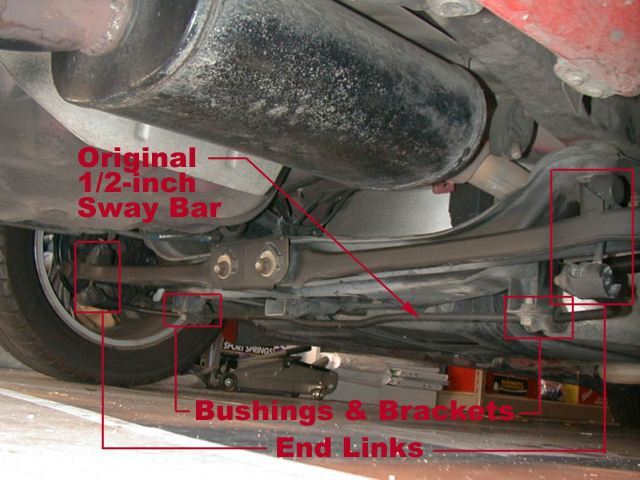
The bar that Ford/Mazda equipped the 2nd gen Probe/MX-6 with is only 1/2" or 13mm thick, which is too thin in my opinion. Therefore, one of the first handling modifications that you can do to improve your car's handling is to purchase and install a rear anti-sway bar. Addco makes the most readily available and it's 22mm or 7/8" thick. This is very large and helps to create a fair amount of oversteer. During my first autocross after installing the Addco, it was very easy to break the rear end loose.
The steering is more responsive, even in a straight line at low speeds. My car corners much flatter now and corners can be taken much quicker than before, but I attribute this to the combined effect of having installed Eibach springs, Tokico Illumina struts, and the Addco anti-sway bar.
Installation was not as straightforward as it should be, so some of the problem spots are listed below so you can avoid them. The Addco anti-sway bar installs at the same mounting points as the original bar and uses all of the same hardware; the only thing replaced besides the bar itself, is a new set of polyurethane bushings that come with the bar. I have replaced these bushings with Energy Suspensions bushings.
Tools needed:
First step - Removing the original sway bar
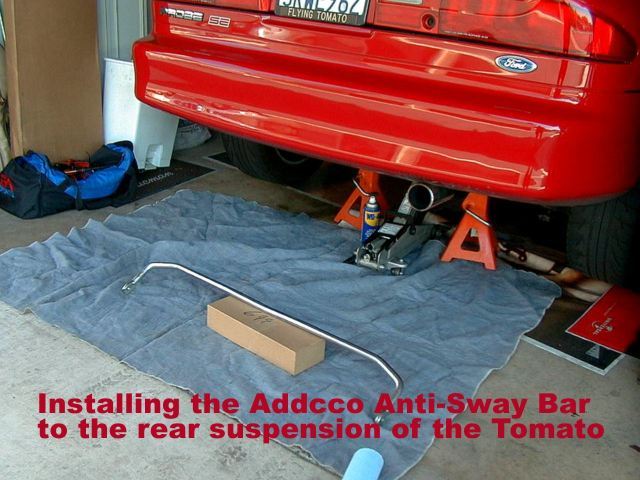
The first thing you need to do is park the car on a level surface, park the car in gear, and place some wheel chocks on your tires. Next, lift the vehicle using the floor jack. Once high enough to your liking, place the jack stands as seen in the picture below.
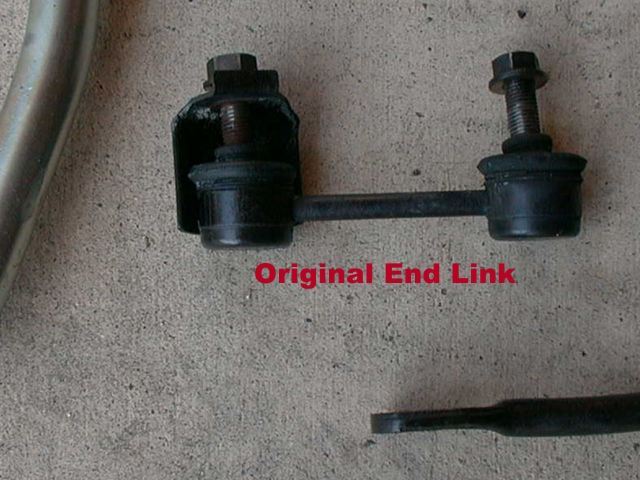
The bar itself is held on with 4 nuts and 2 bolts, with 2 of these nuts being connected to the endlinks and the rest located at the end of the bushing brackets. Use the 14mm socket or wrench to remove these nuts and bolts. Now some folks have reported difficulties removing the nuts from the endlinks, due to the shaft turning. To make things easier, use a 14mm wrench and place a 5mm hex wrench into the end of the shaft. Don't worry, the hex wrench will fit right in.
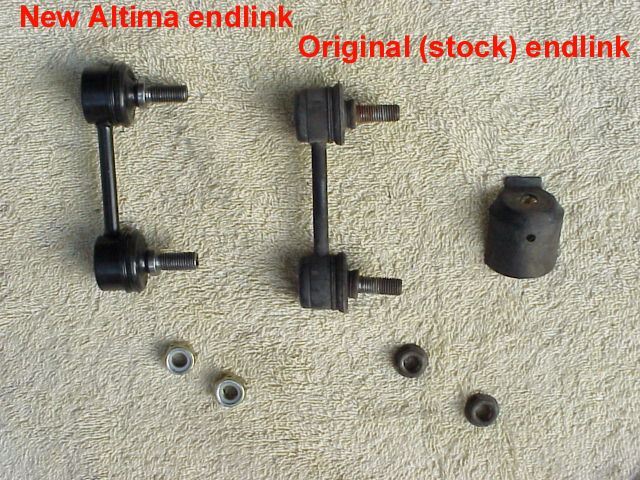
Another problem concerning the endlinks is not being able to turn the nut at all, even if you use the hex wrench. If this happens, you will have no other alternative than to grab a hacksaw and cut the shaft and replace the endlinks. The current cost for Ford replacements is around $80 for each. A good alternative is to use a set of endlinks from a Nissan Altima (part # GA2C-28-170B-N, taken from the package I received). These endlinks appear to be thicker and stronger than the original. When I installed my Energy Suspensions bushings, I installed some of these endlinks.
Once the endlinks and bushing bolts/nuts have been removed, the bar simply falls off. Pull it out and set aside.
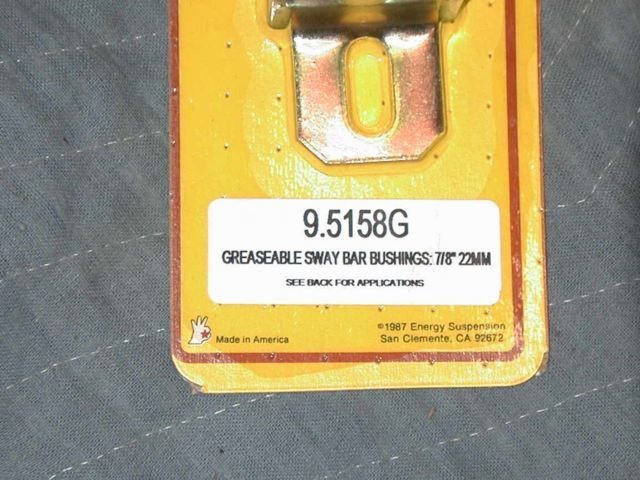
Second step - Installing the new sway bar and Energy Suspensions greaseable sway bar bushings
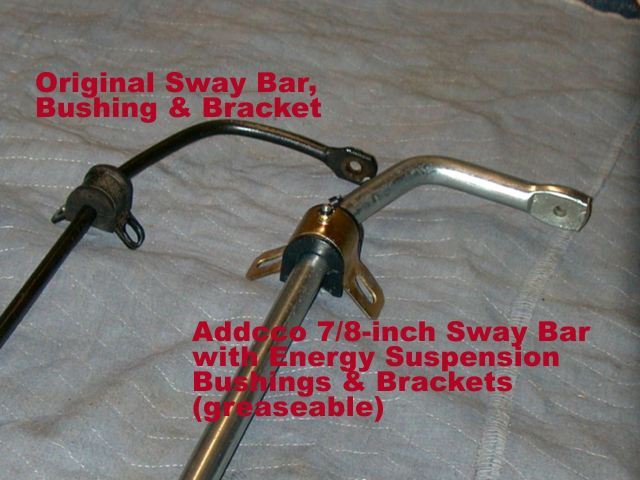
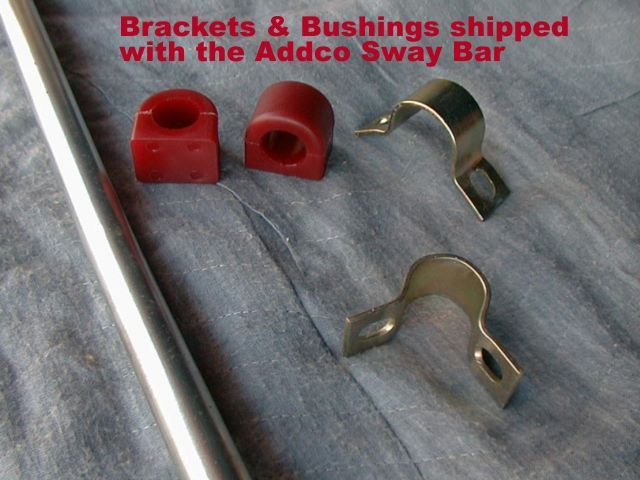
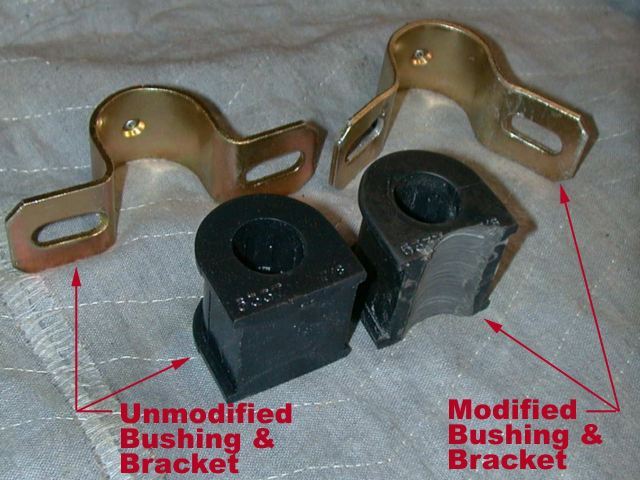
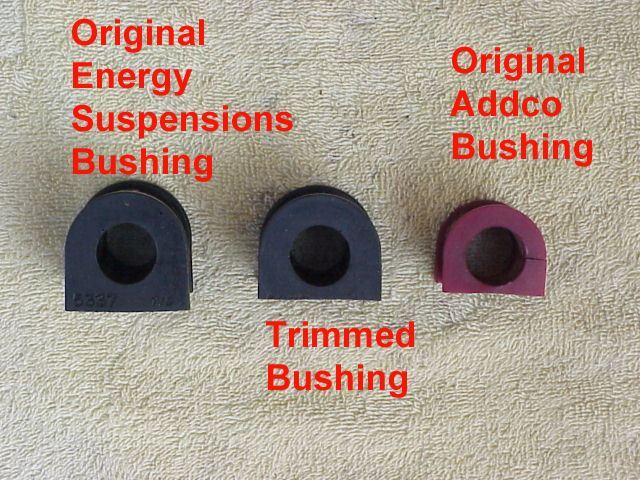
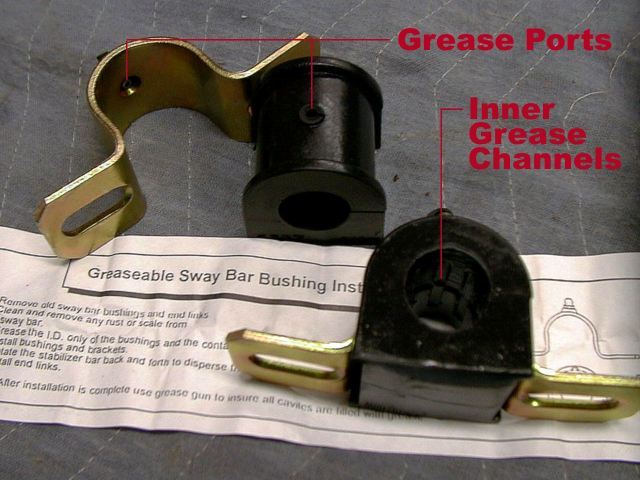
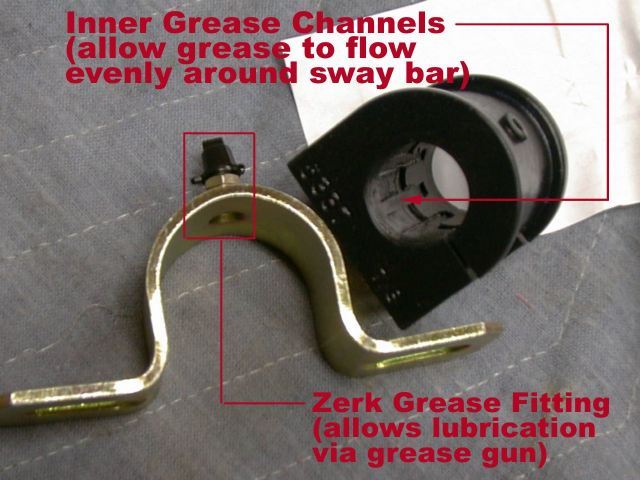
Ok. Addco supplies you with a set of bushings for their sway bar. When I purchased mine, it came with a set of bushings/brackets that fit perfectly. I used them for 6 months without any problems other than the tell-tale squeak. Lino bought the same bar and had a different set of bushings. Rather than try to modify the obviously incorrect Addco bushings, he opted to try the Energy Suspensions bushings. These bushings are quite a bit larger than the Addco units and come with grease fittings on the brackets, so that you can add grease via a grease gun whenever the bushings begin to squeak.
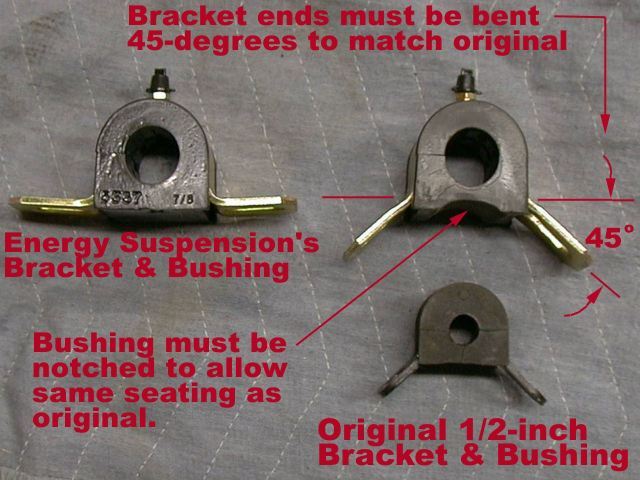
In order to modify the new bushings to fit the Addco bar, there are two ways to do this. One, you can use a Dremel to carve out a small portion of the bushing (see pictures below), or you can do what I did, and trim about 1/4" off the shoulder. Also, the new brackets are quite a bit larger and thicker than the supplied Addco units. To bend them to the necessary 45% angle, you will need a bench vise and a set of vise grips or large pliers.

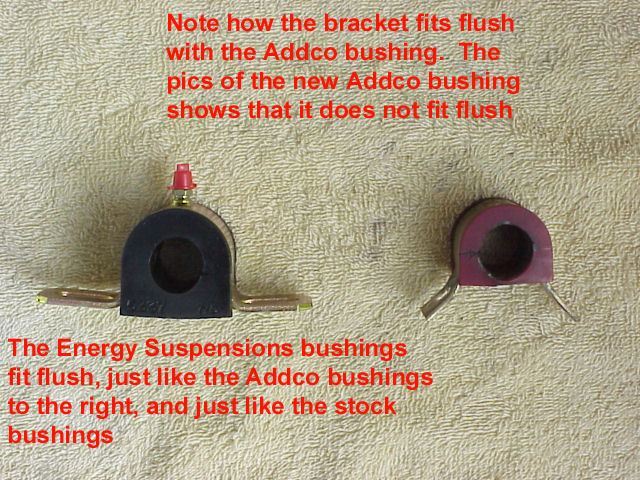
Once you have the necessary bends in the brackets, it is time to mount them onto the sway bar. Before doing so, use some grease from the grease gun (white lithium works best) and fill in the channels on the inside of the bushings. They are split, so getting them on the sway bar is easy. Slide underneath the car and line up the brackets with the mounting points and re-install the nuts and bolts, then tighten.
Third step - Installing the Altima end links
After I reinstalled the sway bar, it was time to pop the new endlinks in. Doing this was quite simple. There is a small clip that comes from the original endlink that you must use on the new units. One thing I also used from the original units was the 14mm nuts. The new endlinks came with 17mm nuts that had nylon inserts. I hated these from the word go, so I did not use them.
When you're finished tightening the nuts, it is time to lower the car and give it a test drive to see how you like the feel of your just-installed anti-sway bar.
Well that's it. This install was an uphill battle, mostly while installing the new bushings, but the final results were well worth the effort. There is no squeaking from the bushings at all and the overall handling of the car is greatly improved.
Hopefully using these notes will help you avoid the problems I had for a quicker and less painful installation.